Apple Pie Cheesecake
Tis the season for apples. My sister in law gave us close to a bushel of apples, and we’ve been working our way through them. Eating, canning, and baking all things apples! It’s honestly my favorite part of fall!

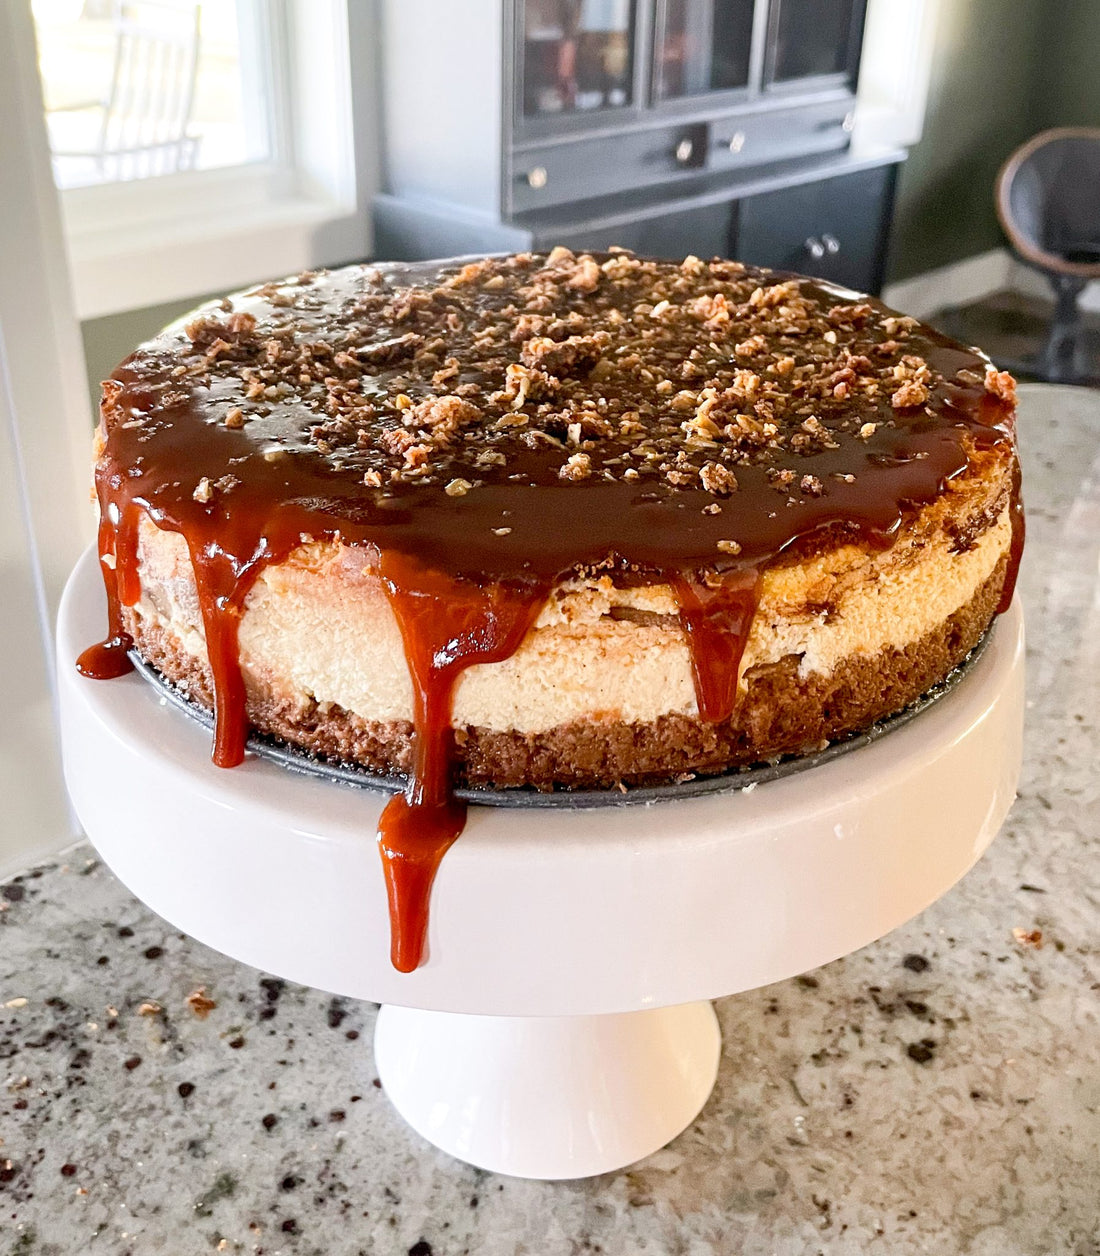
So I attempted something I’ve never attempted before, an apple pie cheesecake. I mean it has to work right? The filling of apple pie perfectly placed in the middle of the cheesecake, all with a salted caramel top– hold on, my mouth is watering.

All in all it turned out absolutely beautiful and quite honestly it was a great way to end our 6 year anniversary, by diving into a delicious fall tasting cheesecake. Jeremy, was very impressed and throughout the night ended up sneaking bites here in there.

I won't bore you with all the things, so the recipe is below. But first here are some pro-tips.
- An apple peeler is a great way to cut down on time
- A water bath is the way to go, there are some people who say putting a pan of water on the rack under the cheese cake works well, personally I haven’t had luck with that. Wrapping your spring pan in foil, placing in a roasting pan (or a large skillet) then pouring boiling water into that pan has worked the best for me.
- Use enough foil. I lay 2 horizontal, and then 2 vertical and then place my spring pan right in the middle and fold up the foil. Not using enough foil has resulted in soggy crust for me.
- Give your self time to make this. Letting it rest for 12 hours in the fridge before taking the spring pan off. Don't try to rush this cake.
- When making the salted caramel, I ended up having some chunks because I didn’t wait for the sugar to dissolve all the way. I ended up straining it and it turned out perfect. So wait for the sugar to dissolve all the way, otherwise straining it afterwards works well too!
